How to Create a Dictionary In WordPress
WordPress Video Tutorial
How to Create a WordPress Glossary With SEO Dictionary Pro
Are you looking to create a dictionary in WordPress? Try our FREE Dictionary Plugin and our Feature Packed PRO ADD-ON. With it you can easily build out a comprehensive glossary on your WordPress site. Follow our easy-to-follow video tutorial to get set up quickly. Enhance your user experience & boost SEO with SEO Dictionary. Start now!
TABLE OF CONTENTS
Step 1 - Setup SEO Dictionary Plugin
Step 2 - Create Your First Term
🔹Chat GPT prompt make a blog post
Step 3 - Create Definition
Step 4 - Add a Quote
Step 5 - SEO Meta Titles & Descriptions
Step 6 - Add Multimedia
Step 7 - Optimize Images
Step 8 - Create an FAQ Section
Step 9 - Setup Author Box
Step 10 - Dictionary Settings
🔹Shortcodes
🔹Advertising
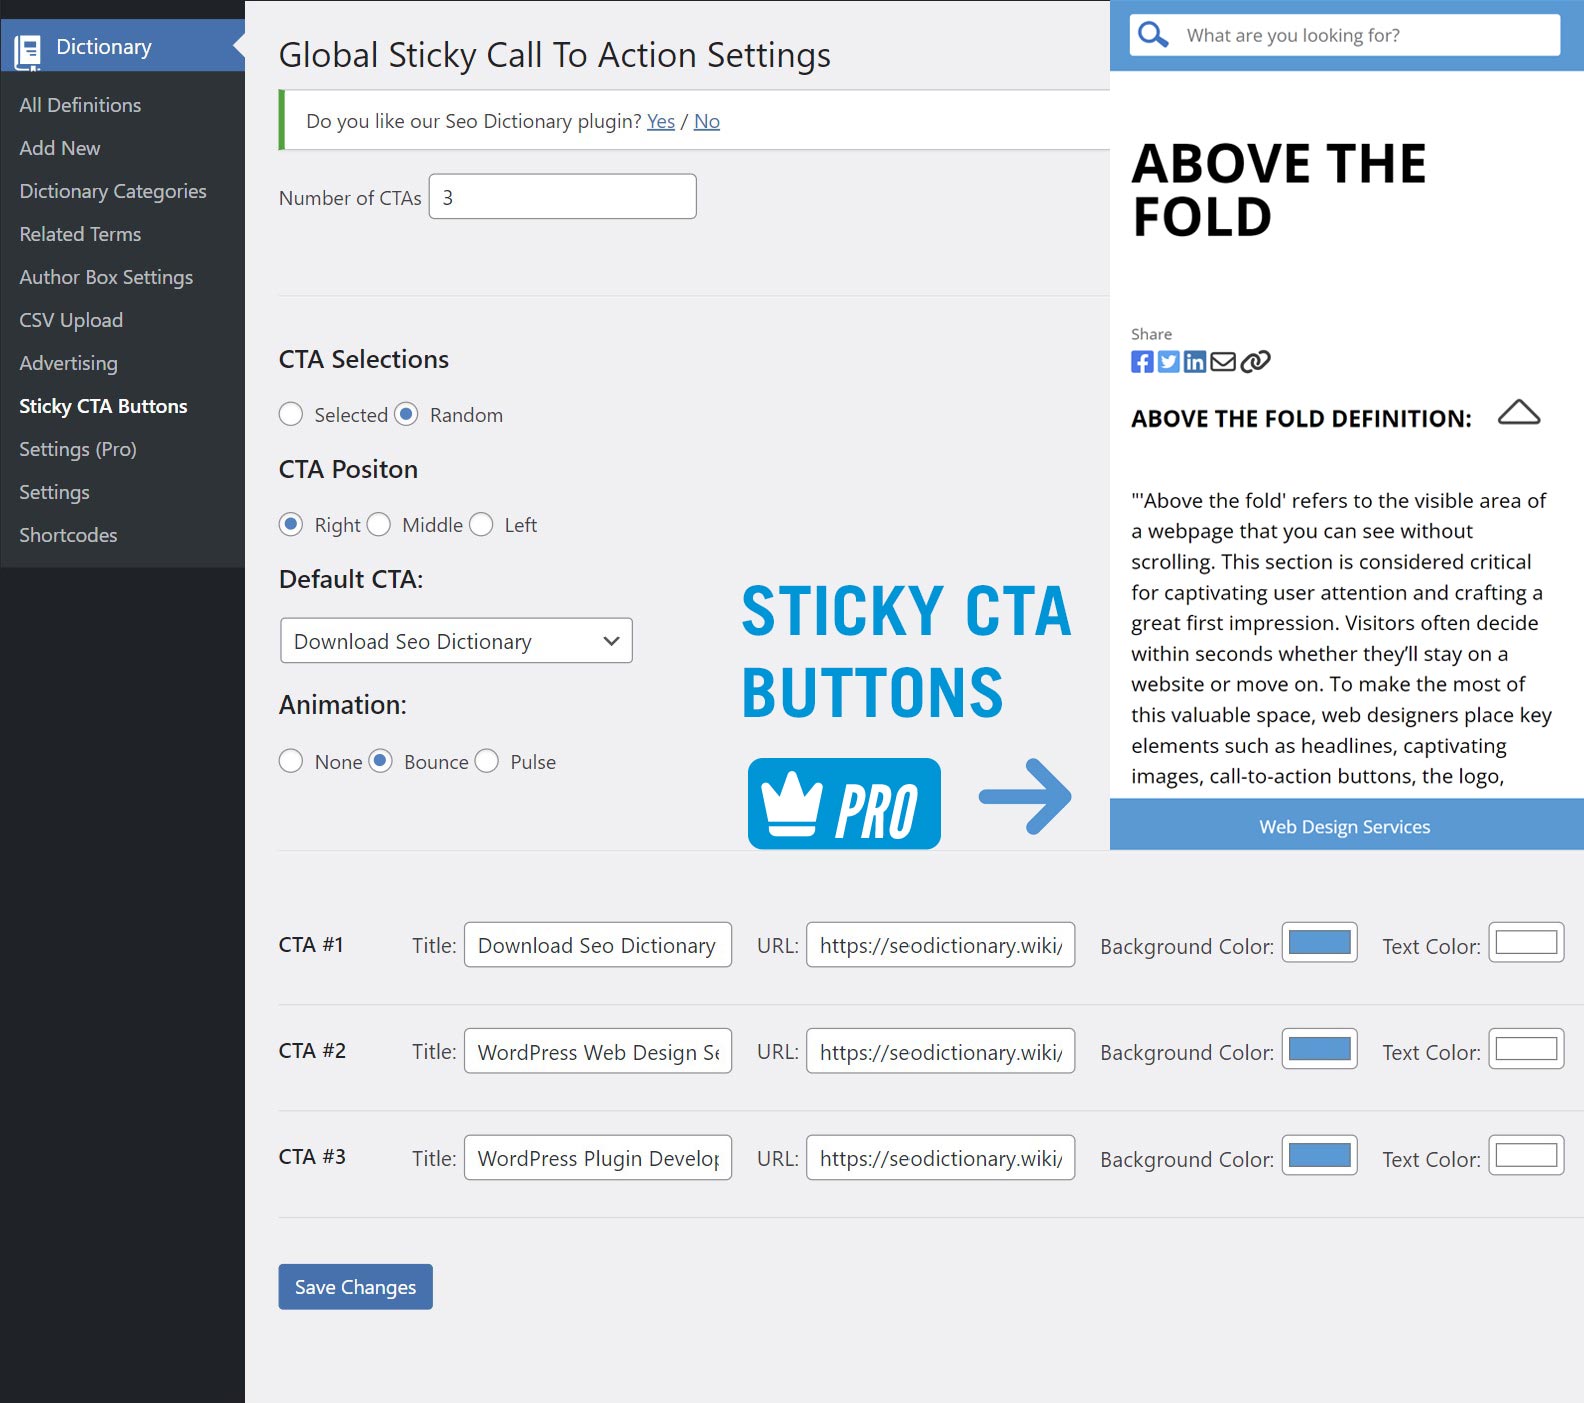
🔹Sticky CTA Buttons
🔹Add Dictionary to Menu
🔹Bulk CSV Upload
Step 1 – Setup SEO Dictionary Plugin
Download Plugins:
Start by creating an account and then downloading the FREE version. After completing the purchase of SEO Dictionary Pro, make your way back to the download area. Click the ‘manage keys download pro’ button followed by ‘download pro version’ on the next page to get the professional package.
Generate a license key: On the same page enter your website’s URL and hit ‘generate’. A table with registered keys will appear; simply copy the newly created key with a click.
Install Plugins: With your key in hand, navigate to the ‘plugins’ section in the WordPress sidebar and select ‘add new plugin’. Use the ‘upload plugin’ button to install the basic plugin first, then click ‘install now’ followed by ‘activate plugin’. Repeat the installation steps for the SEO Dictionary Pro plugin.
Activate Pro Version: Once activated, go to ‘Dictionary’ and then ‘pro settings’ in the WordPress sidebar. This is where you’ll enter the license key you copied earlier. With the key entered, you’re now free to enable all the enticing pro features that caught your eye. Make sure to click ‘save changes’ to secure your adjustments.
TABLE OF CONTENTS
Step 1 - Setup SEO Dictionary Plugin
Step 2 - Create Your First Term
🔹Chat GPT prompt make a blog post
Step 3 - Create Definition
Step 4 - Add a Quote
Step 5 - SEO Meta Titles & Descriptions
Step 6 - Add Multimedia
Step 7 - Optimize Images
Step 8 - Create an FAQ Section
Step 9 - Setup Author Box
Step 10 - Dictionary Settings
🔹Shortcodes
🔹Advertising
🔹Sticky CTA Buttons
🔹Add Dictionary to Menu
🔹Bulk CSV Upload
And there you have it – a heartfelt congratulations is in order as you’ve successfully upgraded your site with SEO Dictionary Pro, paving the way for an enriched user experience and improved SEO performance.

Step 2 – Create Your First WordPress Dictionary Term
Creating a glossary or dictionary on your WordPress site is a straightforward process that can add significant value to your content. Let’s walk through how to populate your dictionary with well-crafted definitions.
Start by navigating to the ‘Dictionary’ section in the WordPress sidebar, and click ‘Add New’.
For our example, we’re leveraging the capabilities of Chat GPT-4 to expedite our content creation.
Make a Blog Post with Chat GPT:
Simply input this prompt into Chat GPT to guide the AI in writing an informative article about your chosen keyword or term. Within moments, Chat GPT will generate content for you—while this might be an initial draft for demonstration purposes, ordinarily, you’d spend additional time refining the content, researching, and tailoring the prompts to ensure completeness.
Ultimate Chat GPT Prompt
Make a Blog Post
Instructions for Blog Content Creation:
These are my instructions on how to write content for a blog. In a moment I’ll give you keywords to base this content off of but first let me know if you understand these instructions. Make sure to write it like a human wrote it so it can pass all AI detection tools. Write a 2000+ word article explaining everything I need to know about this topic.
SEO Optimization Instructions:
Ensure the content has proper keyword density.
Sprinkle related keywords and synonyms throughout.
Adhere to Yoast readability guidelines, including using transition words, varying sentence starts, keeping sentences and paragraphs short, and using mostly active voice.
1. Write a 1500+ word article following this format
Introduction Paragraph:
Start with an engaging introduction that draws the reader into the topic. This should be a concise summary that sets the stage for what’s to come.
Main Headline:
Follow the introduction with a compelling main headline that captures the essence of the entire article.
Subsection:
Subsection Headline: This should be a clear and concise title for the subsection.
Introduction to the Subsection: Write a 3-5 sentence introduction that provides an overview of what this subsection will cover.
Bullet Points: Provide 3 bullet points elaborating on key points within this subsection. Start each point with a bolded lead-in phrase followed by an explanation.
Example Paragraph: Offer a real-world example or a hypothetical scenario that illustrates the main points of this subsection.
Conclusion of the Subsection: Sum up the main takeaways of this subsection in a 3-5 sentence paragraph.

Add Content To WordPress
With your article ready, place your term in the title field of your new dictionary. Add the article into the main content area of WordPress.
Format the Text – Headlines Will Automatically Create a Table of Contents
Take a moment to format the text, using various heading tags (H2 to H5) to enhance readability and automatically generate a table of contents. Remember, H1 is reserved for your main title, and any H6 headings won’t appear in the table of contents—use them for subheadings that you prefer to keep out of the index.
Select Category From A-Z & Add Some Related Terms
Choose the appropriate category for your term, in this case, ‘C’, to represent the first letter of the term, and add related terms as you would with normal WordPress categories to build out a ‘related article’ section.
Step 3 – Create Definition
For crafting the definition itself, insert the prompt you’ve used into the ‘definition section’ within the dictionary custom fields meta box. This will earmark the content specifically as a definition.
Step 4 – Add a Quote
Similarly, generate a compelling quote using a prompt and select the one that resonates the most for inclusion in your content.
Chat GPT Prompt – Create Definition
Write a paragraph explaining the keyword simply as a definition. 4-6 sentences would be good. Make it short to the point without a lot of fluff but pack in the most useful information there is to know about it. What it is. etc
Chat GPT Prompt – Find Famious Quotes
Find a few good quotes on ______. Best if it’s from someone known. If no quotes exist write one of your own. One sentence from the info you have available.
Step 5 – SEO Meta Titles & Descriptions
Now, it’s time to optimize for SEO. Create meta titles and descriptions using the prompt below. Pick the one that you think is best and insert them into your favorite SEO plugin
Chat GPT Prompt – SEO Meta Titles & Descriptions
Write 3 different 150 character meta descriptions and titles incorporating the main keyword. This description should be crafted to entice users to click on the article. Do this by clearly stating what the user will gain from reading this article. Appeal to their emotions. Invoke feelings of excitement, fear, happiness or curiosity. Use words like effortlessly, how to, easy, quick, effective, amazing or simple. Try one as a question to peak curiosity. Adding numbers in the titles work well to entice clicks.
Step 6 – Add Multimedia
Audio:
Seo Dictionary supports audio files and podcast links. Simply add the link to your file or podcast in the Dictionary custom fields meta box and the plugin will take care of the rest..
Video:
To keep your visitors engaged, you can add YouTube videos related to your content. Add a link, to the “Video Link” section in the dictionary custom fields area. If you want to add more than one video separate each link with a pipe character “|“, This will form an interactive video slider.
To add a featured image, source a high-quality graphics from a stock image website like Adobe Stock. Check out our blog post on the most expansive list of over 100+ stock resources.


Add Titles To Image (Optional)
For an added touch, you can superimpose text onto the image using an image editor like Photoshop for a professional look. Once satisfied, export the final design as a JPG file, ensuring the file size isn’t excessively large for web use. For featured image, you can specify a custom alt attribute; by default, it will use the term and append ‘definition’ to it
Step 7 – Optimize Featured Image With WebToolbox.Pro
Bulk WebP Image Optimizer Tool
When it comes to optimizing images for your website, striking the right balance between quality and file size is crucial. Here’s how to achieve that effortlessly with WebToolbox.pro.
If you’re a new user, take a moment to register an account; if you’re returning, simply log in. Once you’re in, look for the ‘Bulk image optimizer’ option.
This powerful tool allows you to process multiple images at once, saving you a tremendous amount of time.
With the bulk image optimizer open, upload the images you wish to optimize. After your images have been uploaded, scroll down to the ‘Global controls’ section. Here, you can apply uniform settings to all your images with ease. Set the width to a standard 1280 pixels—this is an optimal width for many blog posts. Next, adjust the quality setting to between 60 and 80 percent. This range usually provides a good compromise between image clarity and file size.
Once you’ve set your parameters, click on ‘convert all’. This process is often impressively effective, and as you’ll notice, it can significantly reduce the file size—in this case as much as 433%. It’s like a little bit of digital magic.

Compare With Before & After Slider:
If you’re curious about how the optimization has affected your image, simply click on the image. A comparison slider will appear, allowing you to see a side-by-side before-and-after view. This feature is incredibly useful to ensure that the quality still meets your standards after compression.

Download Optimized Image:
When you’re satisfied with the quality and file size, proceed to download the image in the WebP format by clicking the ‘download WebP button’. WebP is a modern format that provides superior lossless and lossy compression for images on the web, ensuring faster loading times and less bandwidth consumption.
The final step is to upload your optimized image to your WordPress site. By doing so, you’ll enhance your site’s performance, improving page load speeds, and providing a better user experience while still maintaining the visual appeal of high-quality imagery.
Optimizing images is a smart practice for an efficient, speedy website without compromising on visual quality. With tools like WebToolbox.pro, it’s easier than ever to achieve professional results.
Step 8 – Create an FAQ Section
Creating an FAQ section can significantly improve the user experience on your website by providing answers to common questions. Here’s a streamlined process for adding a well-formatted FAQ section to your WordPress post.
Generate FAQ With Chat GPT:
To kick things off, let’s generate a list of questions that will form the basis of your FAQ section. Utilize Chat GPT by inputting the prompt blow to produce a series of relevant questions. Chat GPT will output the questions with Heading 4 tags, which is perfect for FAQ formatting as it helps to differentiate questions from other content elements.
Chat GPT Prompt – Create FAQ Section
List of 25 FAQs about this topic. Write a good comprehensive paragraph about each of them. Wrap each question with <h4><b>Question</b></h4> So I can easily copy into WordPress.
Paste In Generate HTML Code:
Once you have your list of questions, it’s time to add them to your WordPress site. Head back over to WordPress and navigate to the second content section. This is the section where you wish to place your FAQs.
Move from the ‘Visual’ to the ‘Text’ mode in the editor. This mode allows you to paste the HTML code generated by Chat GPT directly into the text area of your post. Don’t worry about the raw code; once you’ve pasted it, you can switch back to ‘Visual’ mode.
Check Enable FAQ Option:
Before publishing, there’s an essential step not to overlook— Click the enable ‘Q/A Post’ option. Enabling this will apply the specific formatting needed to make your FAQ section look clean, professional, and easy to navigate.
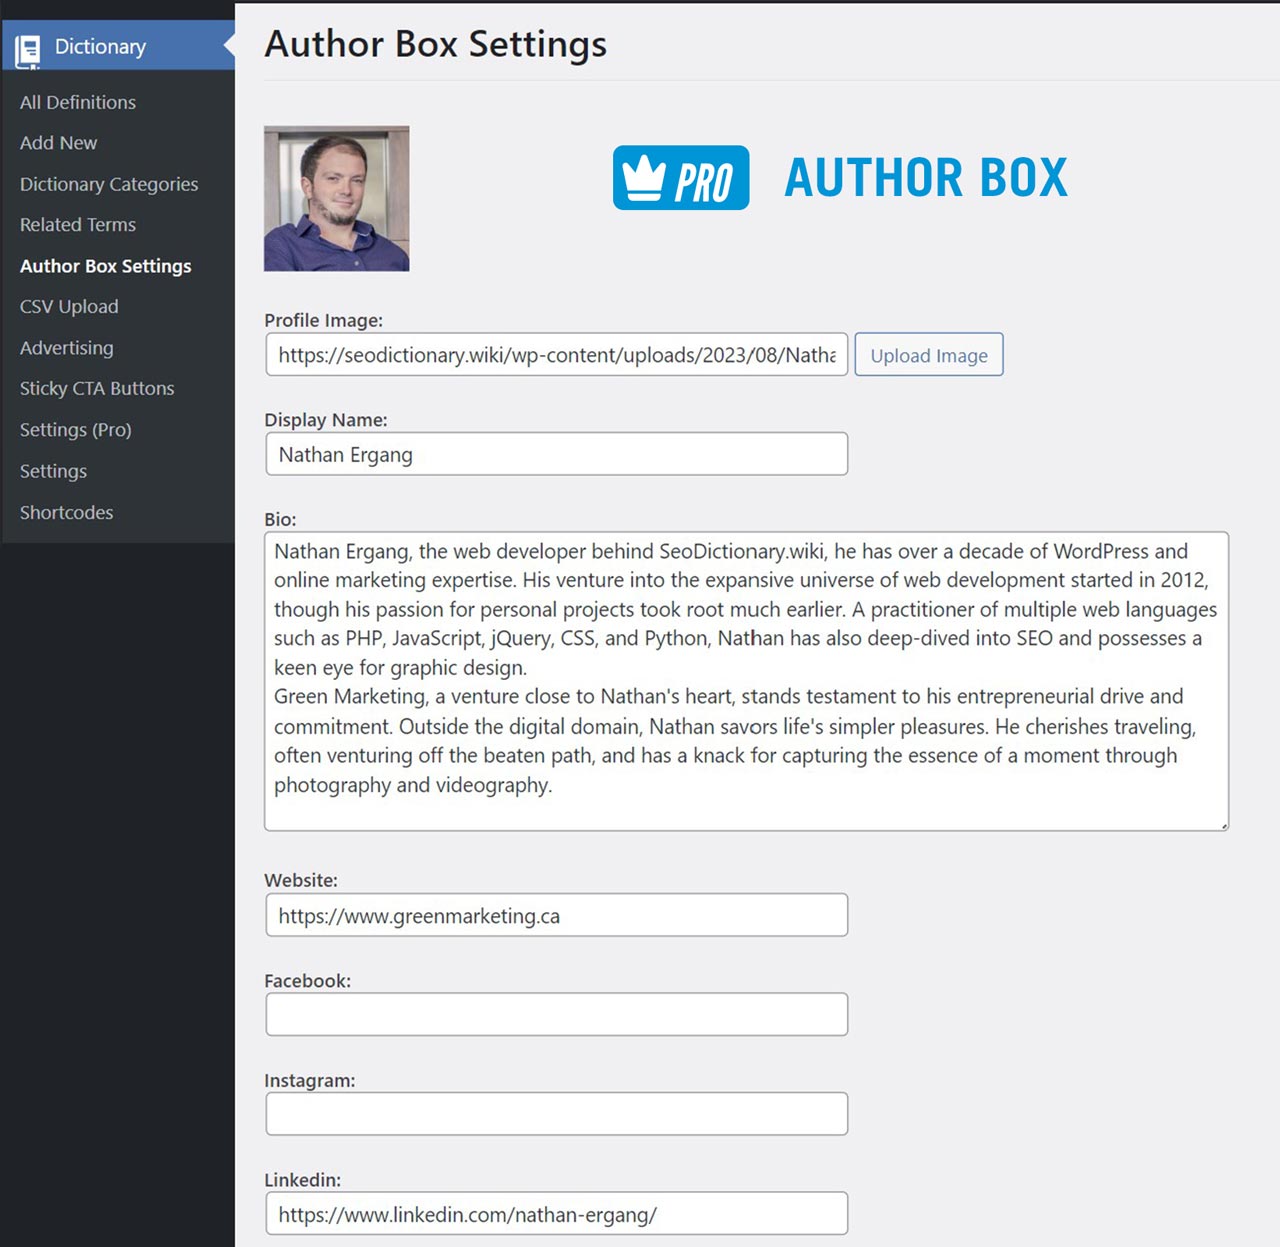
Step 9 – Set up Author Box
Incorporating an author bio into your content is a smart move for boosting your website’s credibility and appeasing the Google E-A-T (Expertise, Authoritativeness, and Trustworthiness) algorithm. Here’s how to craft an engaging author bio for your WordPress site.
Upload a Author Profile Image:
Begin by selecting a stylish and professional photo of the author. A high-quality image conveys professionalism and adds a personal touch, making the content feel more relatable.
Write a Compelling Bio:
In the bio, it’s time to shine a light on the author’s expertise and credentials. Highlight the author’s experience, notable achievements, education, or any accolades they’ve received. This isn’t just fluff—it’s critical information that demonstrates to Google and to readers why the author is a reliable source of information.
Add Links To Authors Online Presence:
In addition to the written bio, incorporating links to the author’s professional website, portfolio, or personal blog can further establish credibility. These links provide a direct pathway for readers to discover more about the author’s professional background and body of work.
By taking these steps, you not only help to improve your site’s standing with Google’s E-A-T guidelines but also provide valuable context to your readers. An informative author bio can make your website appear more authoritative, instilling trust in your content and potentially improving your site’s ranking in search engine results.
Step 10 – Dictionary Settings: Customize Your WordPress Glossary
When it comes to customizing your WordPress dictionary SeoDictionary has a variety of options to explore. Here’s how you can utilize the different features available in the Dictionary settings to tailor your site to your needs.
Customize Dictionary Settings:
Firstly, within your WordPress dashboard, navigate to the ‘Dictionary’ section and select ‘Settings’. This is where you can configure the core aspects of your dictionary.
Adjust the number of posts to be displayed, determine the order in which they appear, and toggle features like automatic internal linking to enhance SEO.
Use the color options for aesthetic appeal and to make sure your dictionary matches your brand.
There are also settings to modify spacing, dictate content order on term pages, manage YouTube channel integrations, and add social share icons.
Shortcodes
For more bespoke page designs, visit ‘Dictionary’ followed by ‘Shortcodes’ in the WordPress sidebar. Shortcodes are invaluable for crafting custom pages that can showcase your dictionary terms in unique ways, beyond the default page templates.
Advertising
Looking to monetize your dictionary? Head over to ‘Dictionary’ then ‘Advertising’ in the WordPress sidebar. These settings allow you to upload and manage advertisements that will appear within your dictionary posts. With options to include vertical, horizontal, and mobile ad types, you can enhance revenue potential by displaying ads that blend seamlessly with your content.
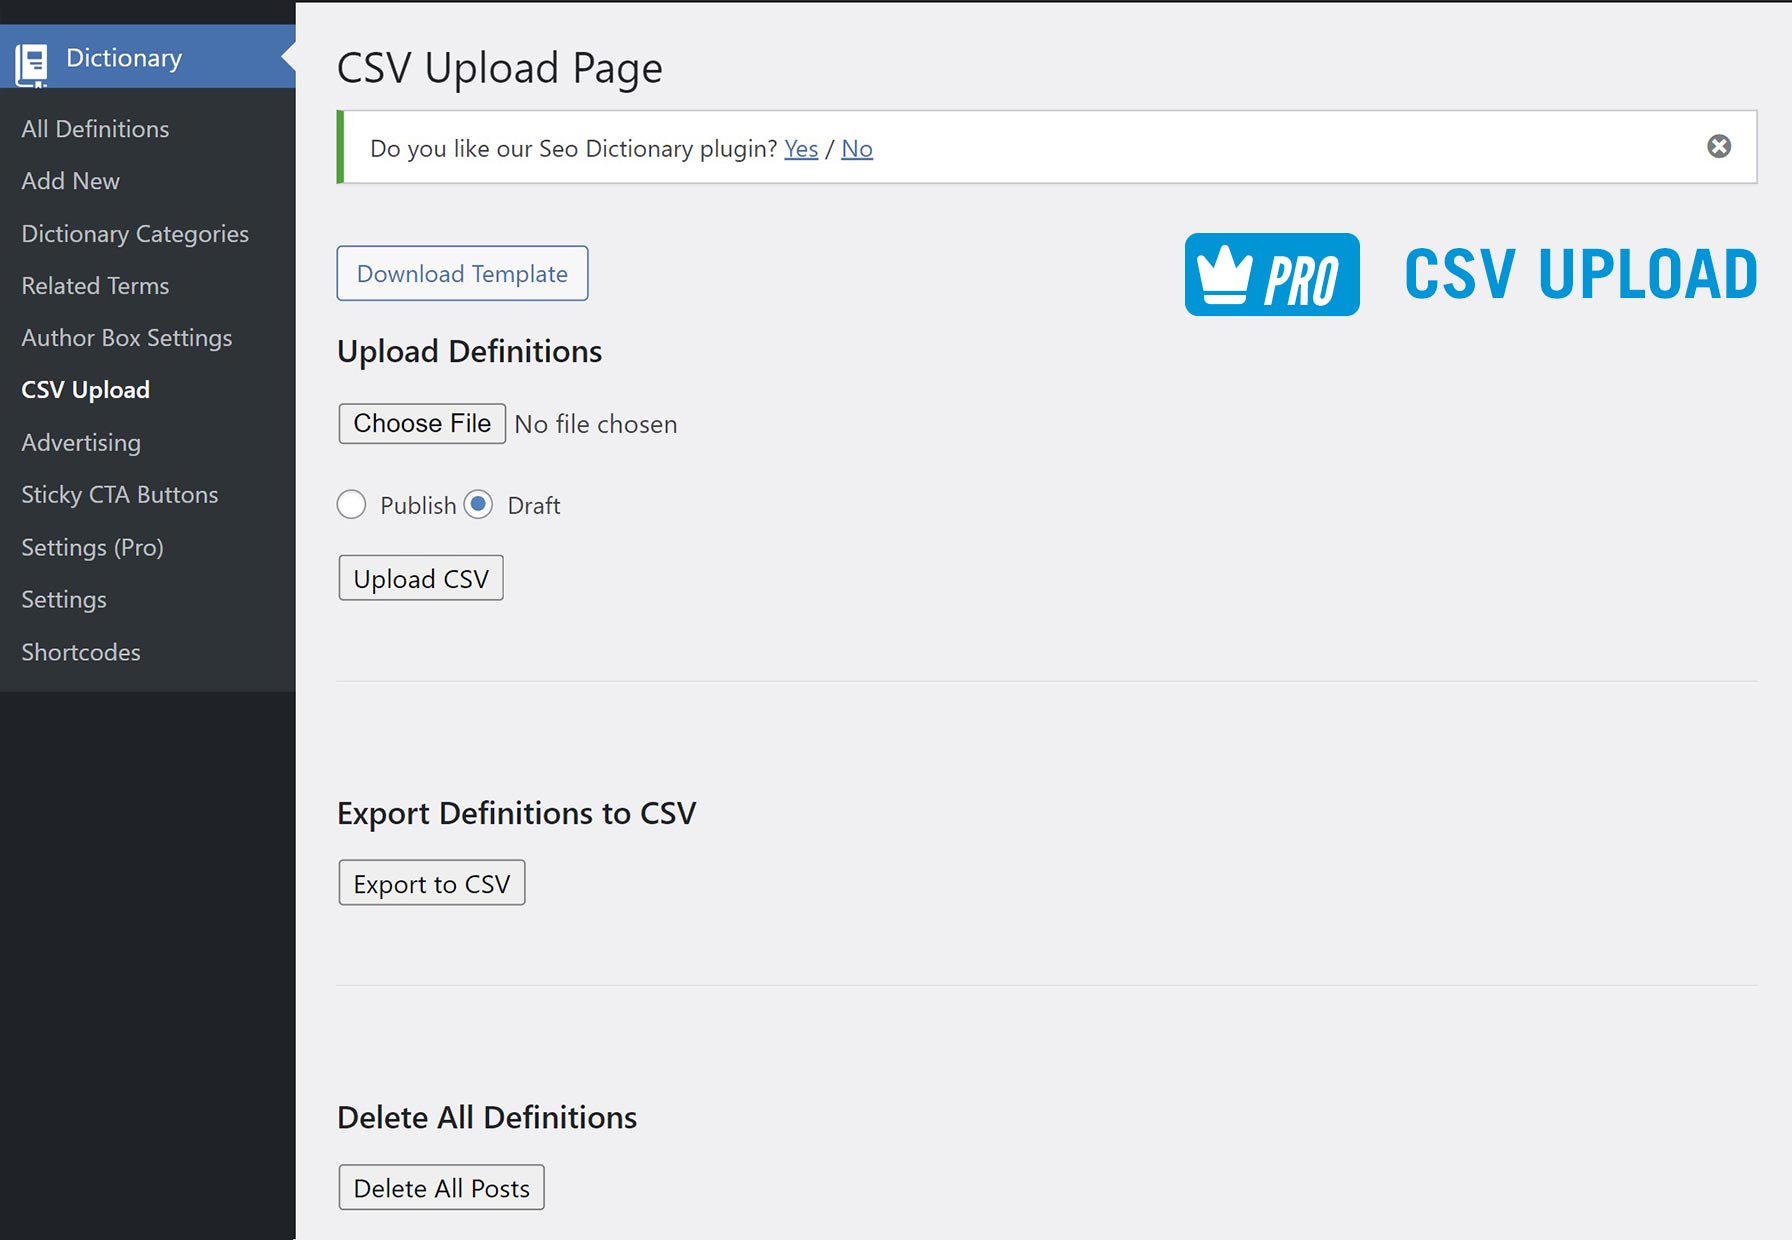
Bulk CSV Upload
Remember to integrate your dictionary into your site’s navigation by going to ‘Appearance’ and then ‘Menus’ in the sidebar. Add a custom link to your menu, using your website’s URL followed by ‘/dictionary’ as the path, and label it ‘Dictionary’. Position it within your menu structure where it best fits the flow of your site.
This concludes our tutorial on how to create a dictionary on a WordPress website. If you have any questions or need help creating a dictionary content for your website feel free to contact us. We can help you build a stylish new website, build you a custom WordPress plugin or help you with search engine optimization. Thanks for watching and don’t forget to subscribe for more SEO and website related content.


